Configuring FEX on a ACI Leaf Switch
Configuring FEX on a ACI Leaf Switch
FEX refers to "Fabric Extender". FEX allows for the use of more cost-effective devices with a reduced set of features that are connected to the Leaf Switches. Some of the advantages of FEX are as follows:
Advantages of FEX
Scalability
FEX enhances scalability by providing a way to extend the number of ports available on a switch. This is particularly useful in large and dynamic data center environments where the number of connected devices may vary.
Simplified Management
FEX allows for centralized management from the parent switch, reducing the complexity of managing individual devices. This simplification is beneficial in terms of provisioning, troubleshooting, and overall administration.
Unified Management with ACI
When used in conjunction with Cisco ACI, FEX becomes part of a unified, policy-driven management framework. This integration allows for consistent policy enforcement across the entire network, providing a more holistic and automated approach to network management.
Configuring FEX Switches in ACI
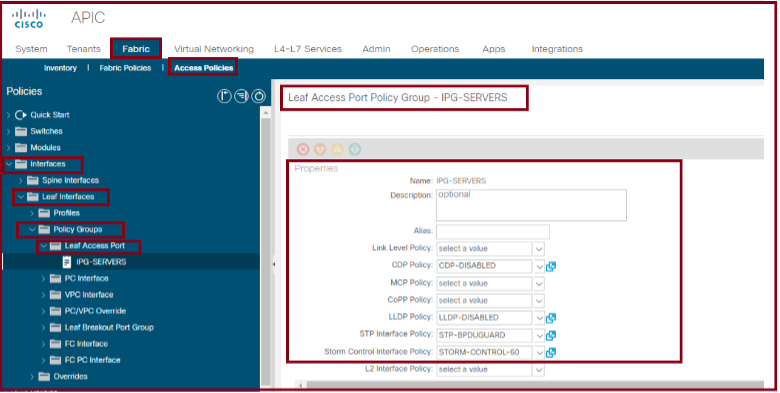
Step 1 – Configuring an Interface Policy Group (IPG)
In this step, you will specify the Interface Characteristics to be configured on the FEX interfaces. In a conventional environment, these characteristics correspond to the commands configured under the Interfaces on an Access Layer Switch, such as BPDU Guard, Port Security, and Disabling CDP.
In our example, we will set up the ports with the following policies (characteristics):
- CDP: CDP Disabled
- LLDP: LLDP Receive/Transmit Disabled
- Port Security: Maximum 5
- Storm Control: 60 Percent
- Spanning Tree: BPDUGUARD Enabled
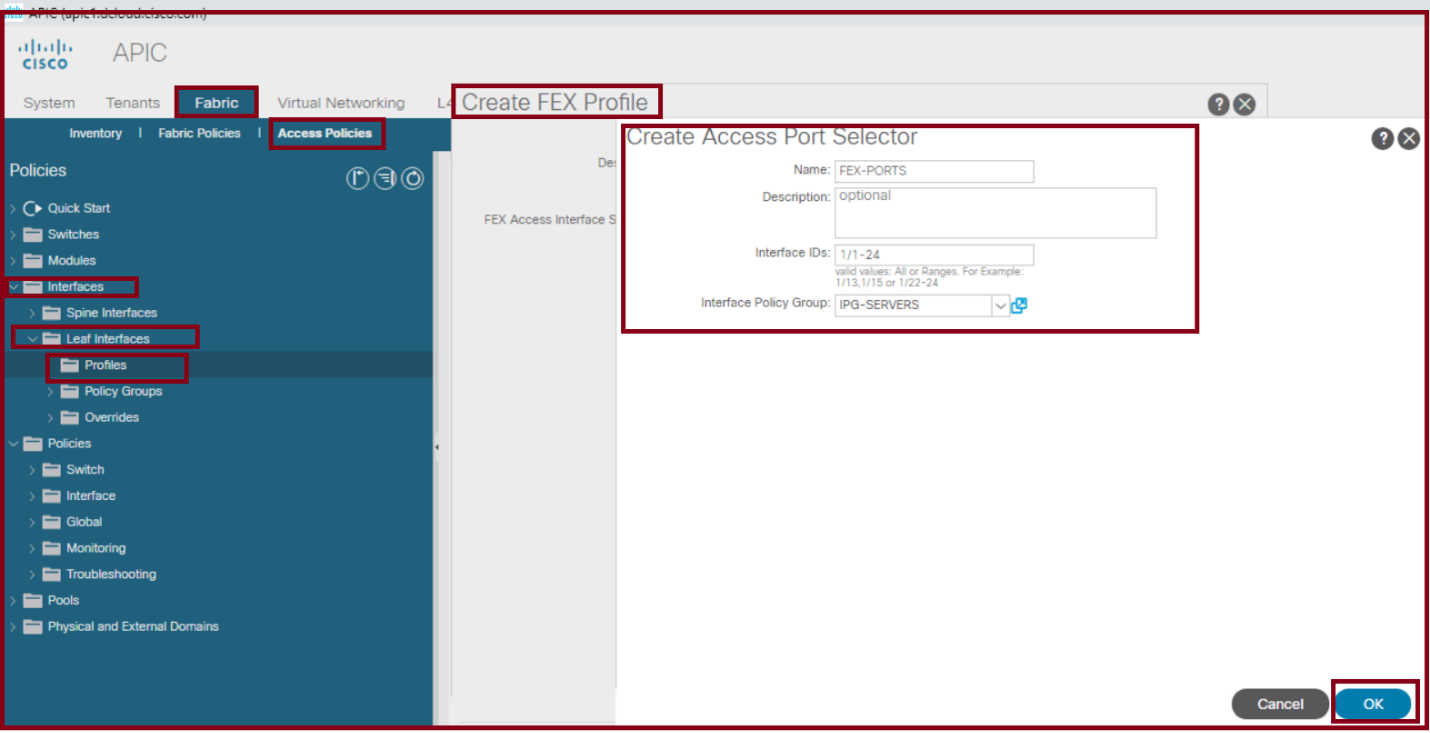
Step 2 – Configuring a FEX Profile
In this step, you will associate the IPG created in the previous step with ports on the FEX Switch. Once the FEX Profile is linked to the Leaf Switch, it will apply the IPG Characteristics to the designated ports.
In our example, the FEX Profile will be configured based on the following:
- Name: FEX-PROF
- Port Name: FEX-PORTS
- Ports: 1/1-24
- IPG: IPG-SERVERS
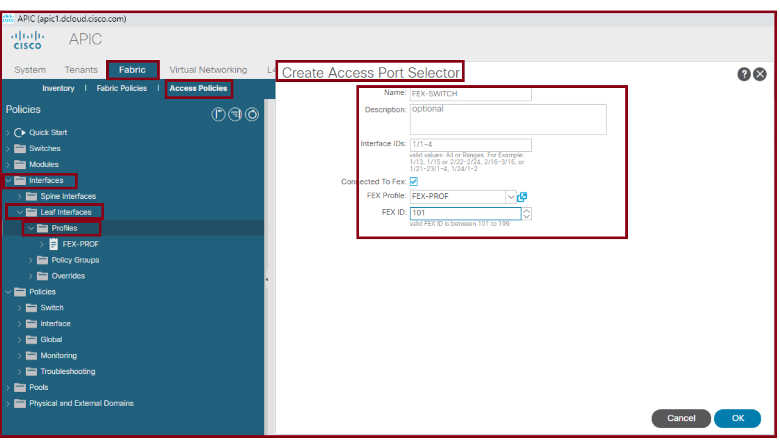
Step 3 – Assigning the FEX Profile to the ports on the LEAF Switch(s)
In this step, you will link the FEX Profile created in the previous step to ports on the Leaf Switch connected to the FEX Switch. You'll also need to assign a FEX ID to the FEX Switch, accomplished by creating an Interface Profile.
In our example, we will create an Interface Profile based on the following:
- Name: INT-PROF-SW1-SW2
- Port Name: FEX-SWITCH
- Uplink Ports: 1/1-4
- Connected to FEX: Checked
- FEX Profile: FEX-PROF
- FEX ID: 101
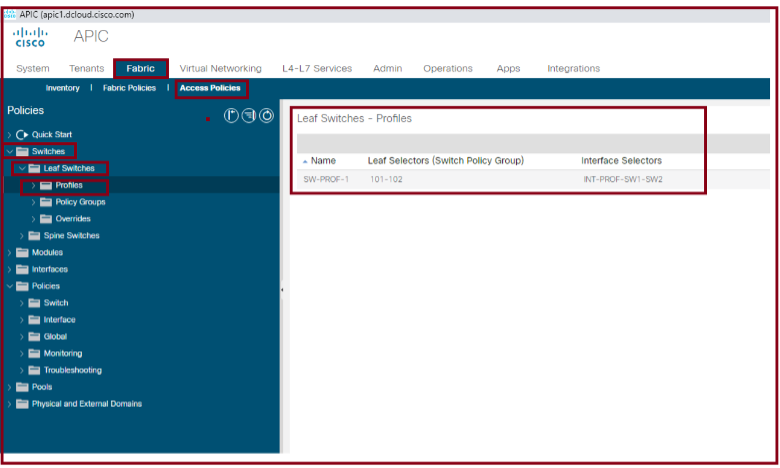
Step 4 – Configuring a Switch Profile and assigning the Interface Profile
In this step, you will associate the Interface Profile created in the previous step with the physical leaf switches that have been onboarded in the APIC. It is necessary to assign the Interface Profile to these physical switches.
In our example, we will create a Switch Profile based on the following:
- Name: SW-PROF-1
- Leaf Names: LEAF-01-02
- Leaf Node ID: 101,102
- Interface profile: INT-PROF-SW1-SW4
Conclusion
At this stage, the discovery process will identify all FEX Switches on the 2 Leaf Switches through uplink ports 1-4. Following the discovery, ports 1-24 will be automatically configured based on the characteristics of the IPG-SERVERS. In essence, you can configure 48 ports within a matter of minutes.